Emel Sweater
Description
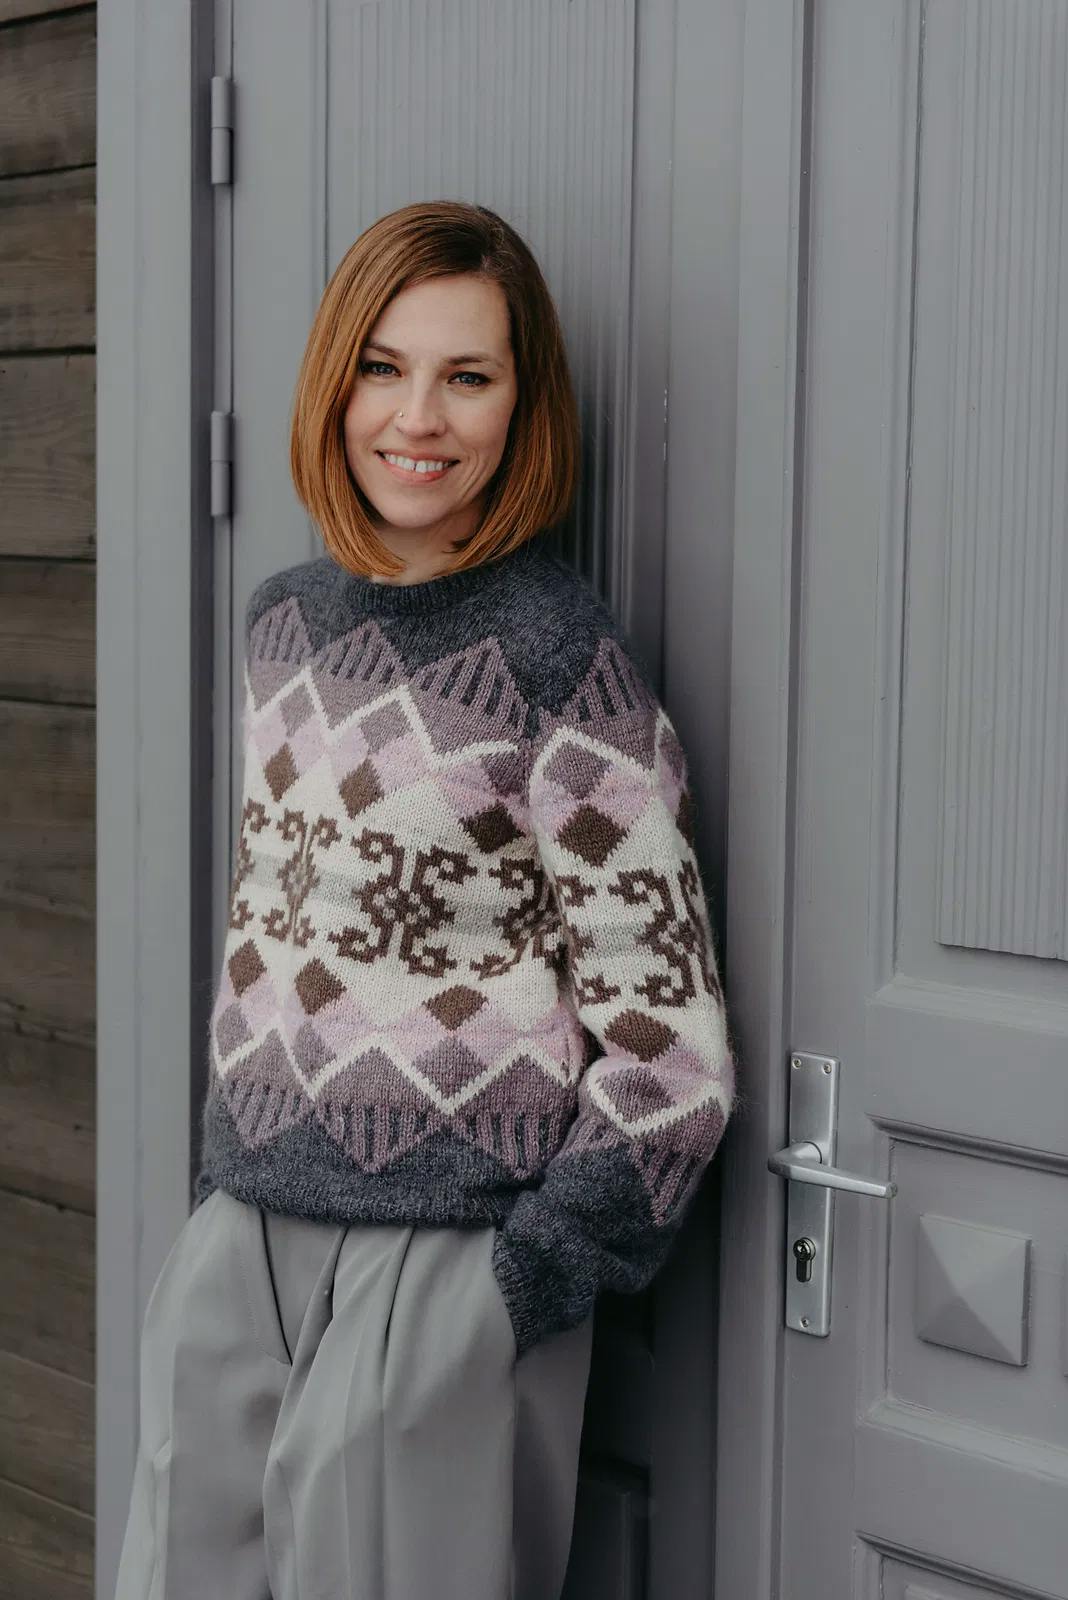
A decision to finally tackle my stash this year and use up as many leftovers and single skeins as possible lead me to design the Emel Sweater. The name represents hopes and aspirations, and my main goal was to create a sweater that doesn’t feel like a random stash-buster but instead looks like a purposeful, statement piece I’m excited to wear
This pattern uses a worsted weight gauge which is perfect for mixing different yarn weights together to create something unique. To make the design a success, I have included some specific rules about choosing colours in five categories. These are arranged in an intensity gradient to make sure the final look is intentional and has the right amount of contrast.
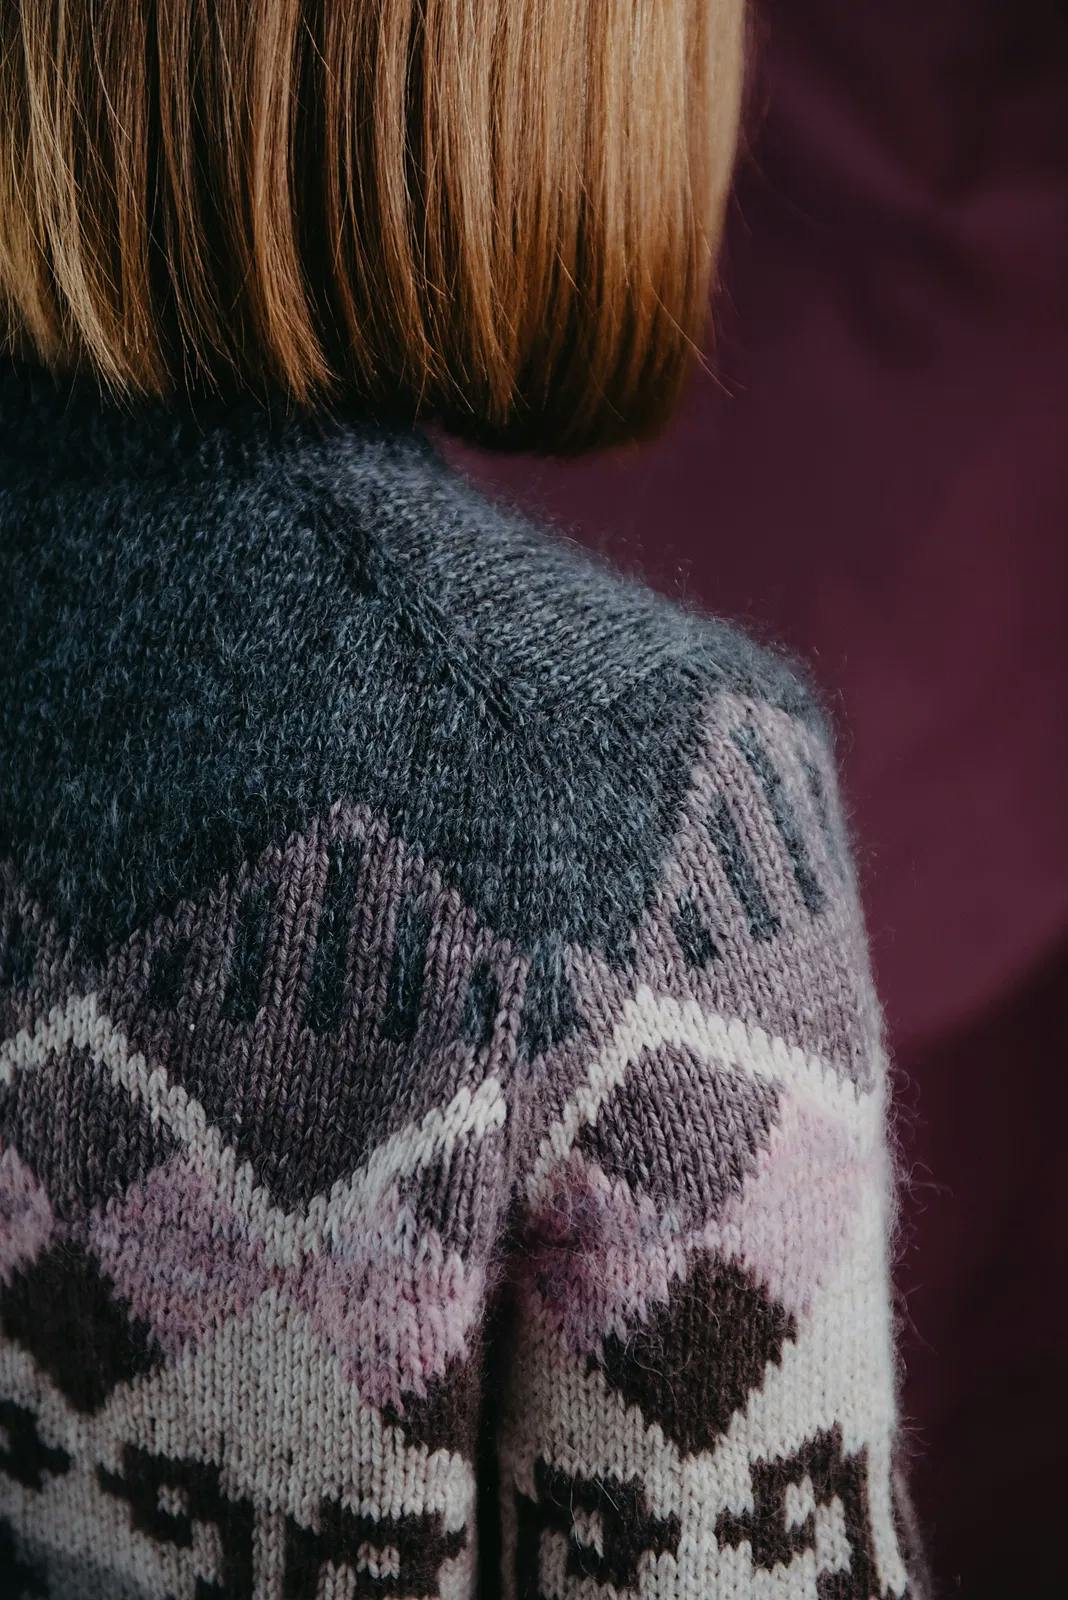
The sweater features geometric colourwork and is worked completely in the round thanks to the seamless top-down construction and European shoulder. Because some of the floats are quite long in places, I recommend using the Ladderback Jacquard method to keep the inside of your work neat and tidy. This was actually my first time experimenting with working three colours at once, but using Ladderback Jacquard makes the process much less intimidating.
I have also created a video tutorial for this part of the project to show you exactly how I handled those few rounds. Have fun combining colours!
Sizes: 1 (2, 3, 4, 5, 6, 7, 8, 9)
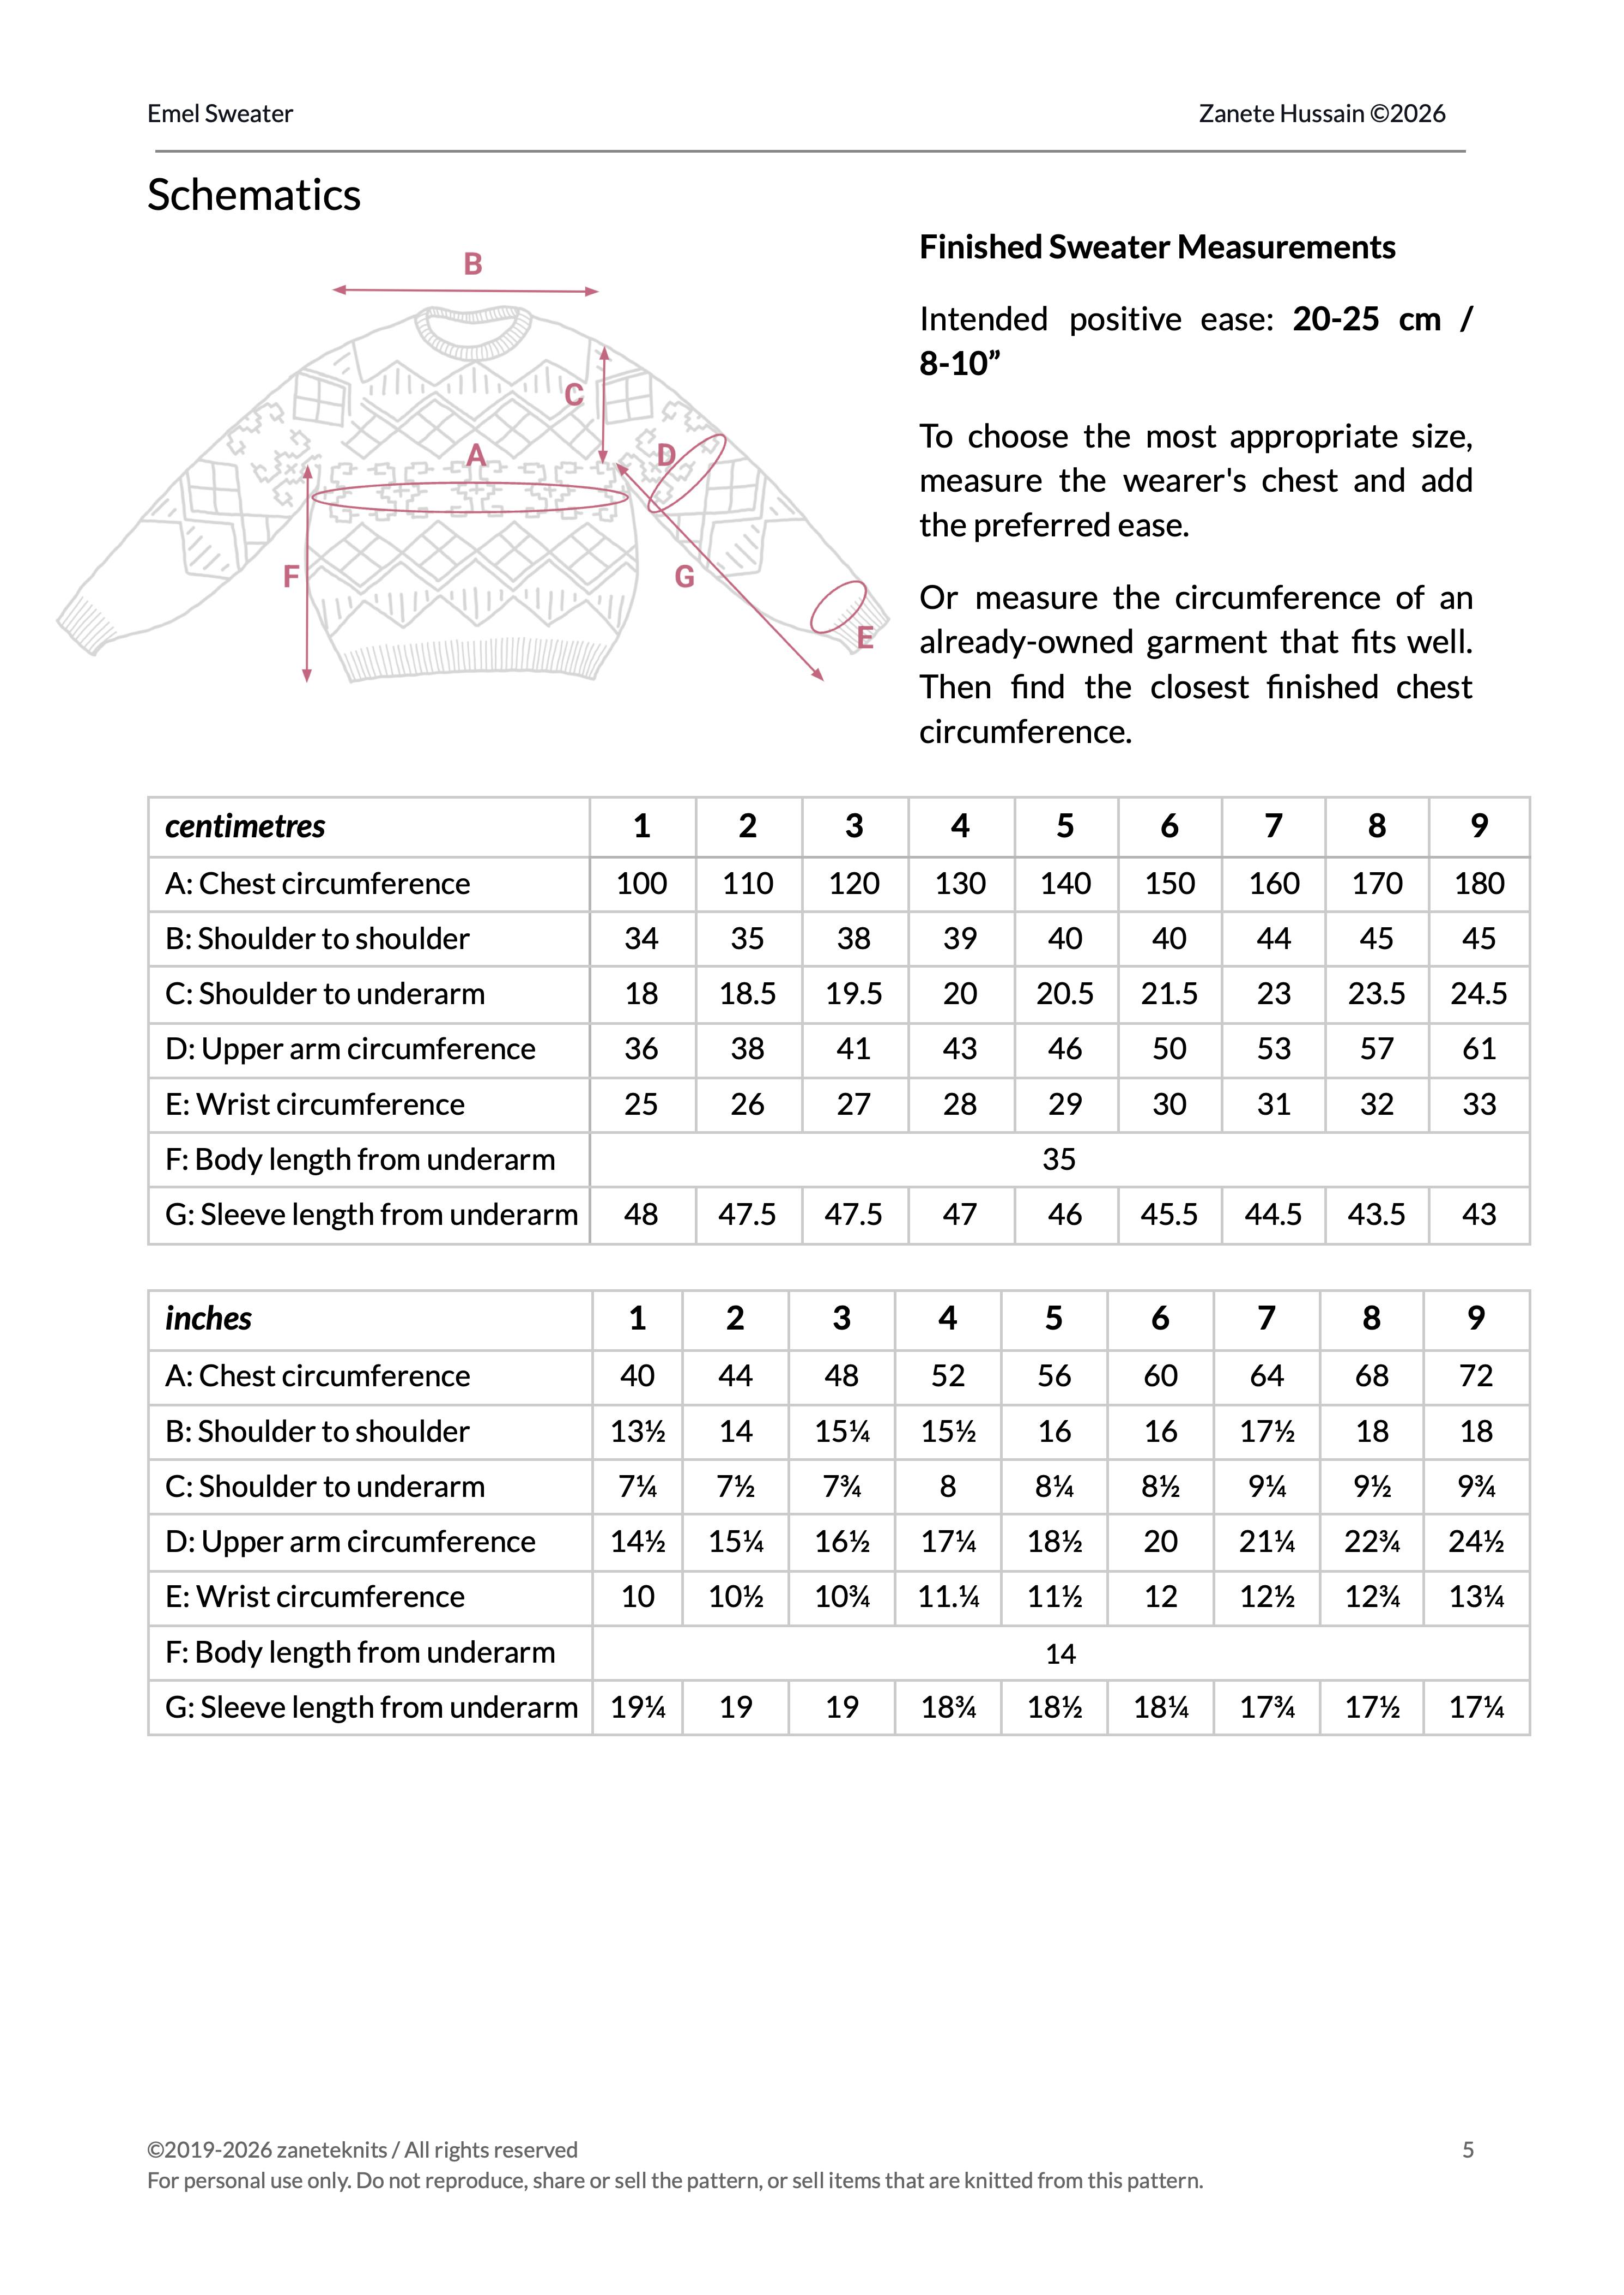
Finished chest circumference:
- 100 (110, 120, 130, 140, 150, 160, 170, 180) cm
- 40 (44, 48, 52, 56, 60, 64, 68, 72)”
Designed to be worn with 20-25 cm / 8-10” positive ease around the chest.
Tag on social media with #emelsweater
Translations provided by knitlingo.com
Note: The product sold here is a knitting pattern in a PDF format and not the finished sweater.
Languages
- English
- Danish
- Dutch
- French
- German
- Spanish
Sizes
1 (2, 3, 4, 5, 6, 7, 8, 9)
Yardage
Single strand of Worsted or Heavy DK, or a combination of yarn weights to be held together (such as sport+lace or fingering+fingering) to achieve gauge.
NOTE: The yarns are grouped by colour into five categories (A to E). Each category should contain yarns of a similar tone.
The tones should progress from lightest to darkest, or darkest to lightest, creating the strongest contrast between category A and category E.
Depending on the length of the sweater, allow approximately:
Category A:
- 740 (780, 850, 910, 970, 1035, 1115, 1185, 1250) m
- 810 (855, 930, 995, 1060, 1135, 1220, 1295, 1365) yds
Category B:
- 250 (265, 285, 305, 330, 355, 380, 405, 430) m
- 275 (290, 310, 335, 360, 390, 415, 440, 470) yds
Category C:
- 130 (140, 150, 160, 170, 185, 195, 210, 225) m
- 145 (150, 160, 175, 190, 200, 215, 230, 245) yds
Category D:
- 35 (40, 45, 45, 50, 55, 60, 60, 65) m
- 40 (45, 50, 50, 55, 60, 65, 65, 70) yds
Category E:
- 410 (430, 465, 500, 535, 575, 615, 655, 695) m
- 445 (470, 505, 545, 585, 630, 670, 715, 760) yds
Yarn in sample
Some of the yarns used in sample (size 2):
Category A:
FDF Squish Fingering held with Debie Bliss Angel
Cardiff Cashmere held with Pascuali Mohair Bliss
Category B:
Onion Sock held with mYak Tibetan Cloud
Category C:
Malabrigo Ultimate Sock held with Universal Yarn Penna
Category D:
Feliz Y Punto Sock Merino held with 2 strands of Ainsworth & Prin Mohair & Silk Lace
Category E:
Knitting for Olive Merino held with Bilum Snek
Yarn weight
Worsted
Suggested needles
- 4.00 mm (US 6) or needle size that gets the gauge; circulars, 60-100 cm / 24-40″ long and (optional) DPNs for small circumference knitting
- 2.75 mm (US 2) for ribbing; circulars, 60-100 cm / 24-40″ long and (optional) DPNs for small circumference knitting
Pattern Category
Sweater
Difficulty
Intermediate
Gauge
20 sts & 28 rows = 10 cm / 4"
Pattern for gauge
Stockinette stitch and colourwork in the round, on larger needles, blocked.
Notions
Stitch markers, locking markers, row counter, stitch holders or waste yarn, tapestry needle.
Techniques used
Lifted increases, stranded knitting, Ladderback Jacquard, Backwards loop cast-on, knitting in the round, 3-needle bind-off.
Notes
The sweater is worked seamlessly from the top down. It starts by casting on stitches for the back neckline and shaping the shoulders using lifted increases.
Stitches are then picked up along the back shoulders to create the front shoulders, working each side separately with increases to shape the front neckline.
Next, stitches for sleeves are picked up along the front shoulder edges, and the yoke is worked in one piece down to the underarm. Increases are added along the sleeves, and body during this section.
The sleeves are separated, and the body is worked in one piece down to the desired length.
The sleeves are worked separately in the round down to the cuffs.
The neckband is added by picking up stitches along the neckline and working 1x1 rib in the round to create a folded neckband.